- Deutsch
- English
Table of Contents
Nextcloud
Nextcloud is a groupware providing a number of web applications and services to aid in collaboration among HfG members and external parties.
Access Nextcloud at https://cloud.hfg-karlsruhe.de using your full primary email address 
support@hfg-karlsruhe.de.
Most of Nextcloud's functionality is available through your web browser. You may also use the Nextcloud Desktop Client to synchronize files between your devices, access your files using WebDAV and connect a calendar software of your choice.
This page only documents the most common use cases, for details, please have a look at the Nextcloud user manual.
Files
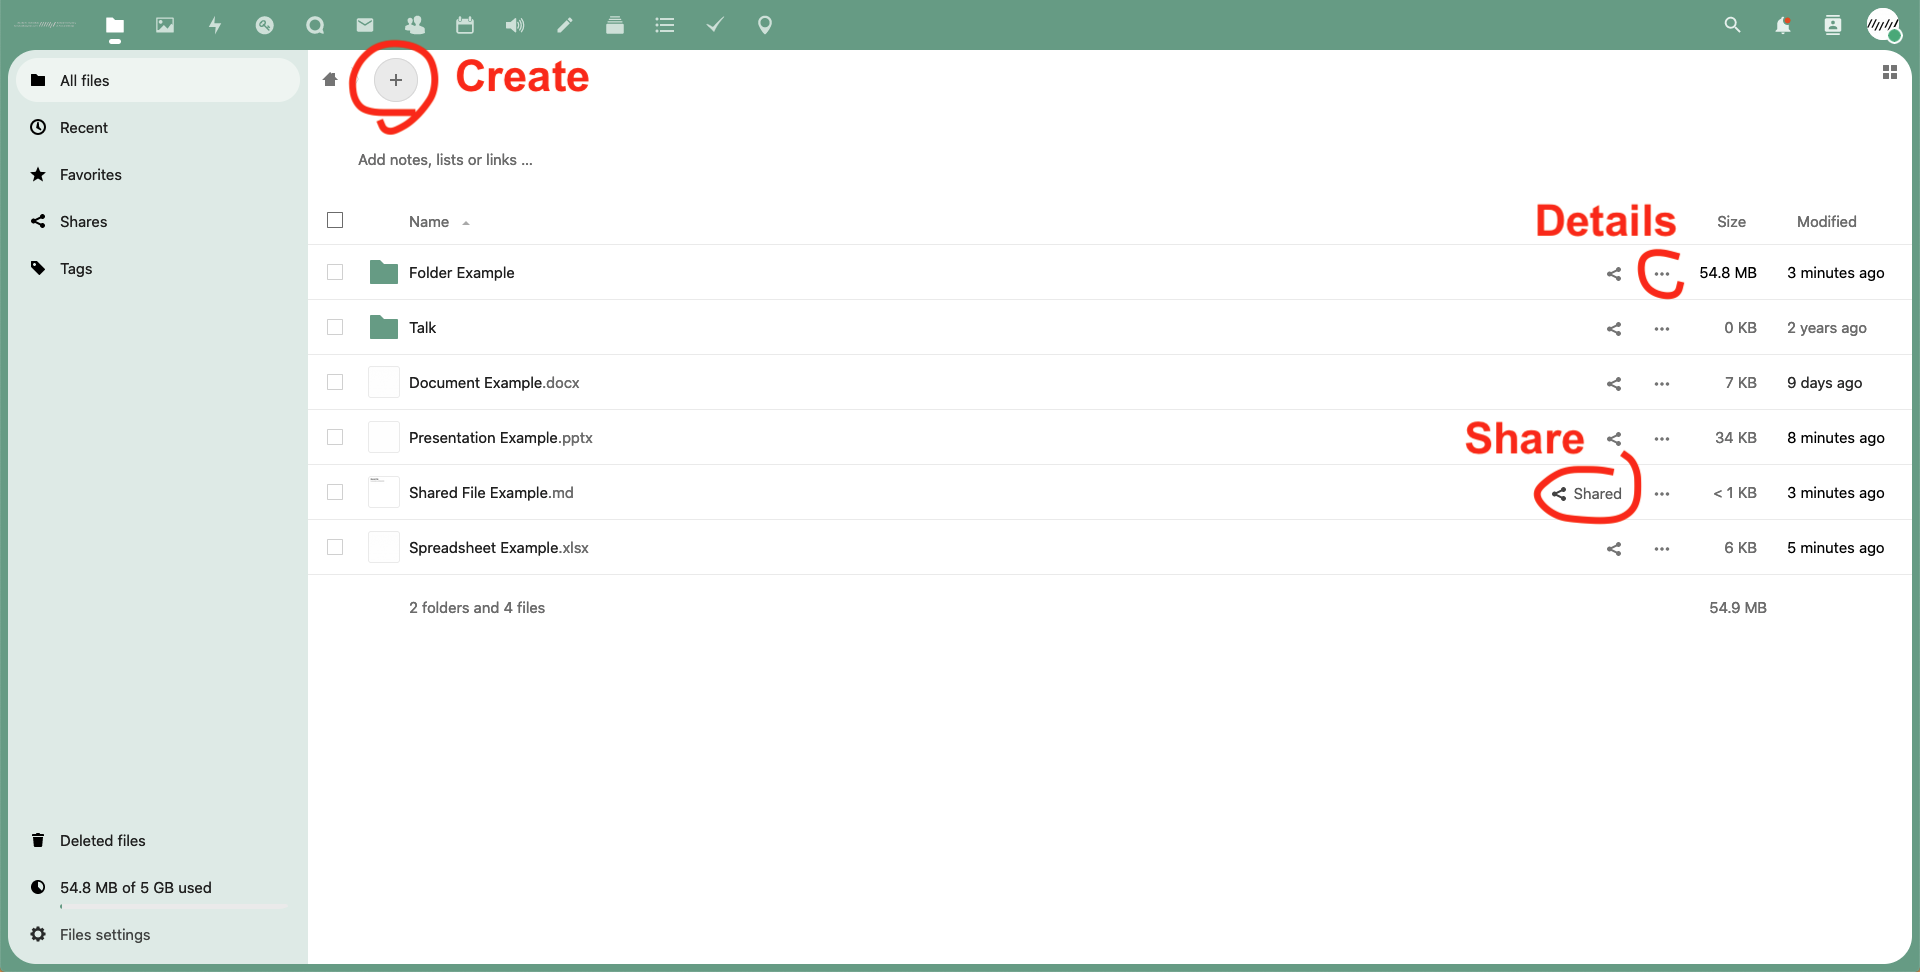
Nextcloud works like any other online drive solution, simply click on the big '+' button to create a new file, on the three dot menu for details, or the sharing icon to share with others (inside or outside HfG). Upload your documents, organize them in folders, etc. You may create documents, spreadsheets and presentations and edit them online using the integrated Collabora Online server.
Calendar
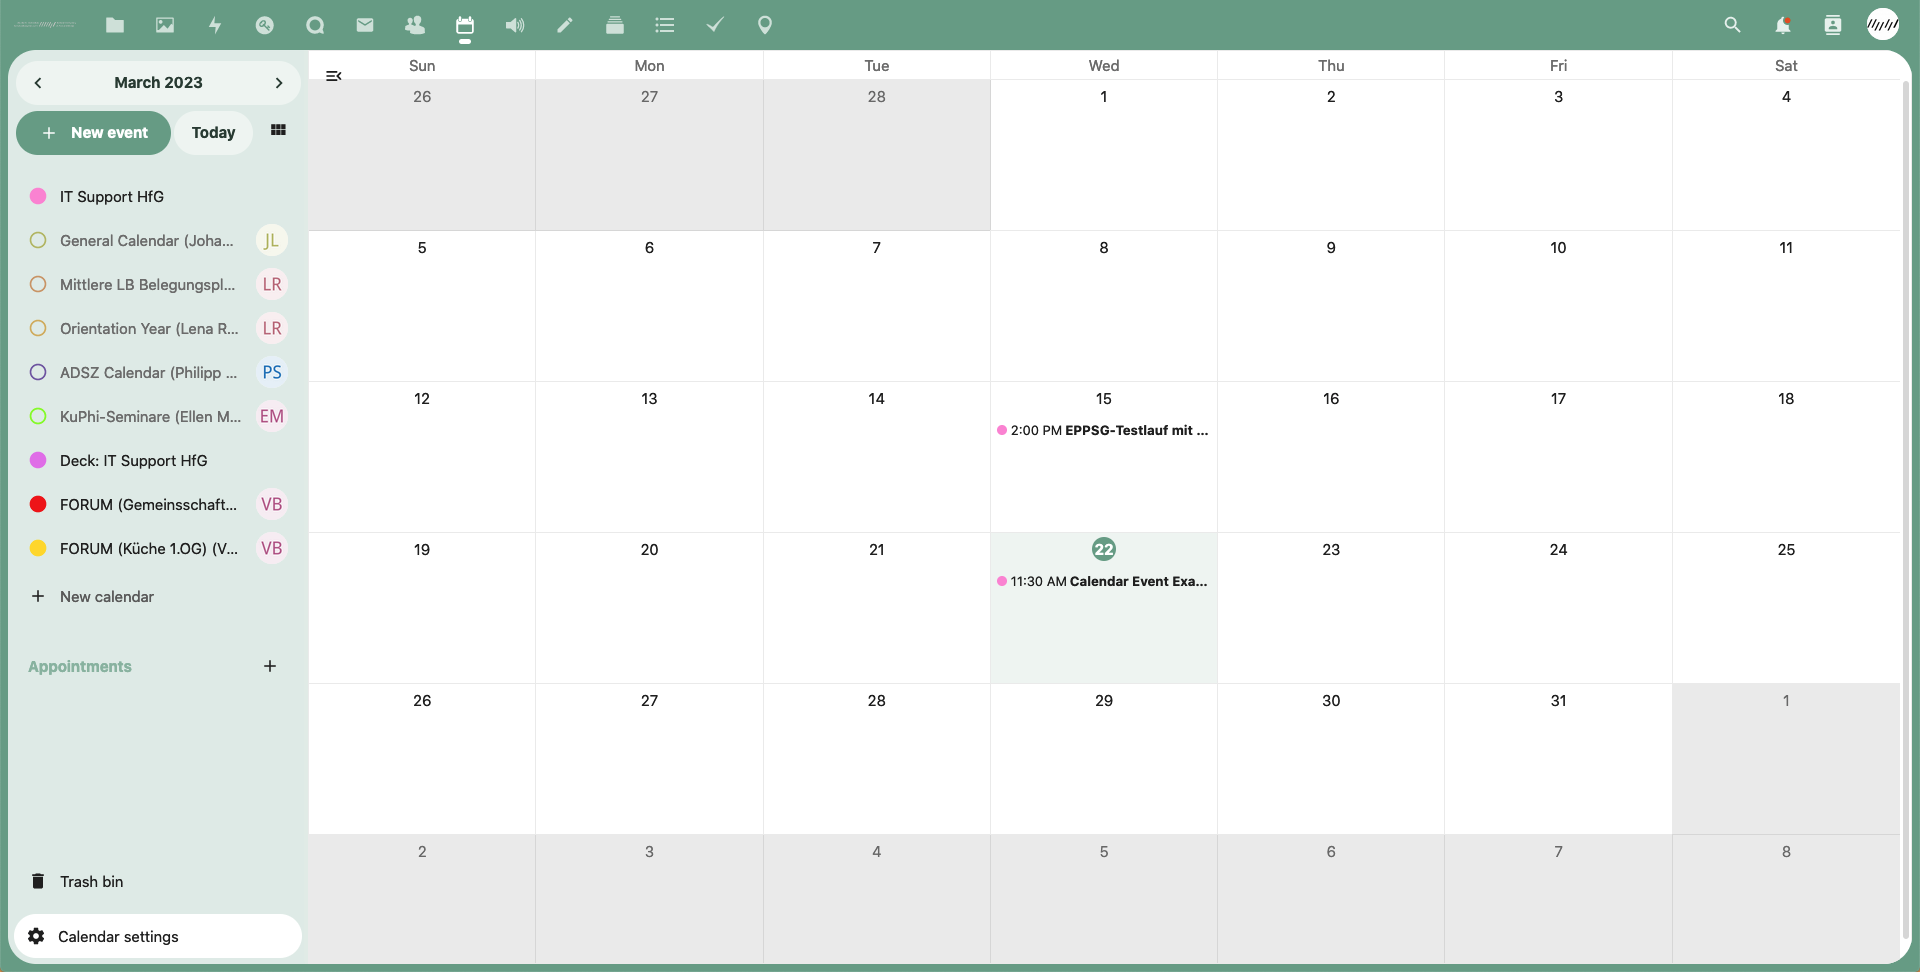
Click on the Calendar app icon at the top. You will find your personal calendar as well as shared calendars from various HfG initiatives. Click on them to toggle their visibility.
Creating events
- Click on the big '+ New event' button, or simply double-click on the date.
- Select which calendar the event belongs to and add details in the simplified editor.
- Click on 'More' to launch the full editor, where you can invite colleagues, add notifications, attachments and more. Note that you can disable the simplified editor, to avoid having to click on 'More': Go to 'Calendar settings' at the bottom left and uncheck 'Enable simplified editor').
Sending invites
- Click 'Attendees' in the advanced editor.
- Start typing the name in the search bar and select the contact when it appears.
- Click on the three-dot menu next to each contact you added to choose if you want to notify them via email.
- Click on 'Update' to finish and send email notifications to your contacts.
Sharing calendars
Create and share entire calendars for specific projects or work groups. Click on the '+ New calendar' button, at the bottom of your calendar list on the left toolbar. Give it a name and it will appear next to your other calendars. Click on the '✏ Edit' button that appears when you hover over it. Share with colleagues like you share events: simply start typing their names.
Synchronize with Thunderbird
- Click on the '✏ Edit' button of the calendar you want to synchronize.
- Copy the private link, which should look something like
https://cloud.hfg-karlsruhe.de/remote.php/dav/calendars/username@hfg-karlsruhe.de/personal/. - Open Thunderbird, go to Calendar and click on the '+' button to create a new calendar.
- Select 'On the network'.
- Choose 'CalDAV', enter your full HfG email address as username (eg.
support@hfg-karlsruhe.de) and the copied link as location.
- Fill in the remaining information: password, calendar name, etc.
- Check your Thunderbird settings to configure notifications and your calendar behaviour.

Processing message failed. Status: 80004005 error when accepting event invites, go to the calendar settings and select 'Prefer client-side email scheduling'.
Synchronize with Apple Calendar
- Click on the '⚙ Calendar settings' button at the bottom left of your screen.
- Select 'Copy iOS/macOS CalDAV address'.
- On your Mac, go to System Preferences > Internet Accounts.
- Click on 'Add Account', then 'Add Other Account…', then 'CalDAV Account'.
- Choose 'Manual' for the account type, your full HfG email address (eg.
support@hfg-karlsruhe.de) as username and paste the link from Step #2 into the server address. - Provide password and details to finish.
Synchronize with Android
- On your Android phone, download these two apps: nextCloud and DAVx⁵ (available for purchase on Google Play, or for free on F-Droid).
- Open nextCloud on your phone and type
cloud.hfg-karlsruhe.dein the Server Address field. Log in with your full HfG email address and grant login permissions.
- Navigate to the App Settings and tap on 'Sync calendars & contacts'.
- DAVx⁵ will open, enter your HfG Cloud credentials once more.
- Name your account and select 'Groups are per-contact categories' in the Contact Group Method menu.
- Open the DAVx⁵ application again and click on the account you just created to grant the application the appropriate permissions.
- Go to the CALDAV tab in order to select the calendars you want to synchronize and hit the refresh button.
- Your Cloud calendars will appear on your regular calendar app.


