- Deutsch
- English
Table of Contents
Documenting and managing projects in the project archive
In the HfG's digital project archive, projects or works are each represented by a so-called “set”, which summarizes the project, and various “media entries” (files such as photos, videos, PDFs, etc. including information about them). The media entries must be linked to the project set.
The following steps are explained in this guideline:
E-mail us your questions orc@hfg-karlsruhe.de
editorial note: The screenshots show the German interface of the project archive and will be replaced soon.
1. Create a project set

To create your work or project in the project archive, you must create a new set using the button at the top right.
The name of the set corresponds to your project title.
2. Fill in the metadata for the project set

Enter the information about your project as metadata. Use the Project/Work and HfG tabs in particular.
The more extensive and precise you fill in the metadata, the easier it will be to research and understand your project in the end.
However, the selected terms (=tags) should be concise, especially for fields with multiple selections. A lot does not help much in this case! It is better to choose fewer but meaningful tags. Avoid repetitions.
There is a separate tab for final theses (diplomas, intermediate diplomas and master's theses); this should be completed in full. See also the entry “graduation projects” in the HfG handbook.
Keywords
Please only use thematic and project-specific keywords here. What is your project about? Think about the keywords under which your project will later be researched (e.g. “climate crisis”, “narrative structures” or “Hannah Arendt”). Again, the more concise the better!
The keywords should not already be queried in other fields (e.g. project type).
Description
Write a text that describes your project as a whole and is as generally understandable as possible. For longer descriptions, it is advisable to write a short introductory paragraph followed by a longer, more detailed description.
Italics are not possible. Please use quotation marks to mark titles.
We do not recommend using quotations in the description texts. However, if you absolutely want to include a quotation, the source should be given in brackets directly after the quotation. Footnotes or endnotes are not possible.
Contributors
You can assign different functions or roles to the contributors and thus clarify exactly how the people have contributed to your project.
3. Share a project set

To make your set visible to others, you must share it via the permissions. Click on the Permissions tab in the view of your project set.
Click on the Edit button below and either enter the name of individual users or select groups. Decide for each group or user whether they can view your set or even edit the metadata and content.
Groups

The group Hochschule für Gestaltung means that every user of the HfG can see your set after logging in.
If you manage a set together with other users, you can also allow them to change the access permissions and thus make the set visible to other users or groups.
Internet

If you share your project set publicly, visitors to the project archive who are not logged in will also be able to see it.
Don't forget to click on “Save” at the end.
4. Upload media
Go back to My archive and upload the files associated with the project.
When the upload is complete, click on Complete media entries to enter the metadata for each file.
5. Fill in the metadata for media entries
Select the media that you would like to complete with metadata. If you move the mouse over the individual entries, a box will appear at the bottom left. This allows you to select your media entries.
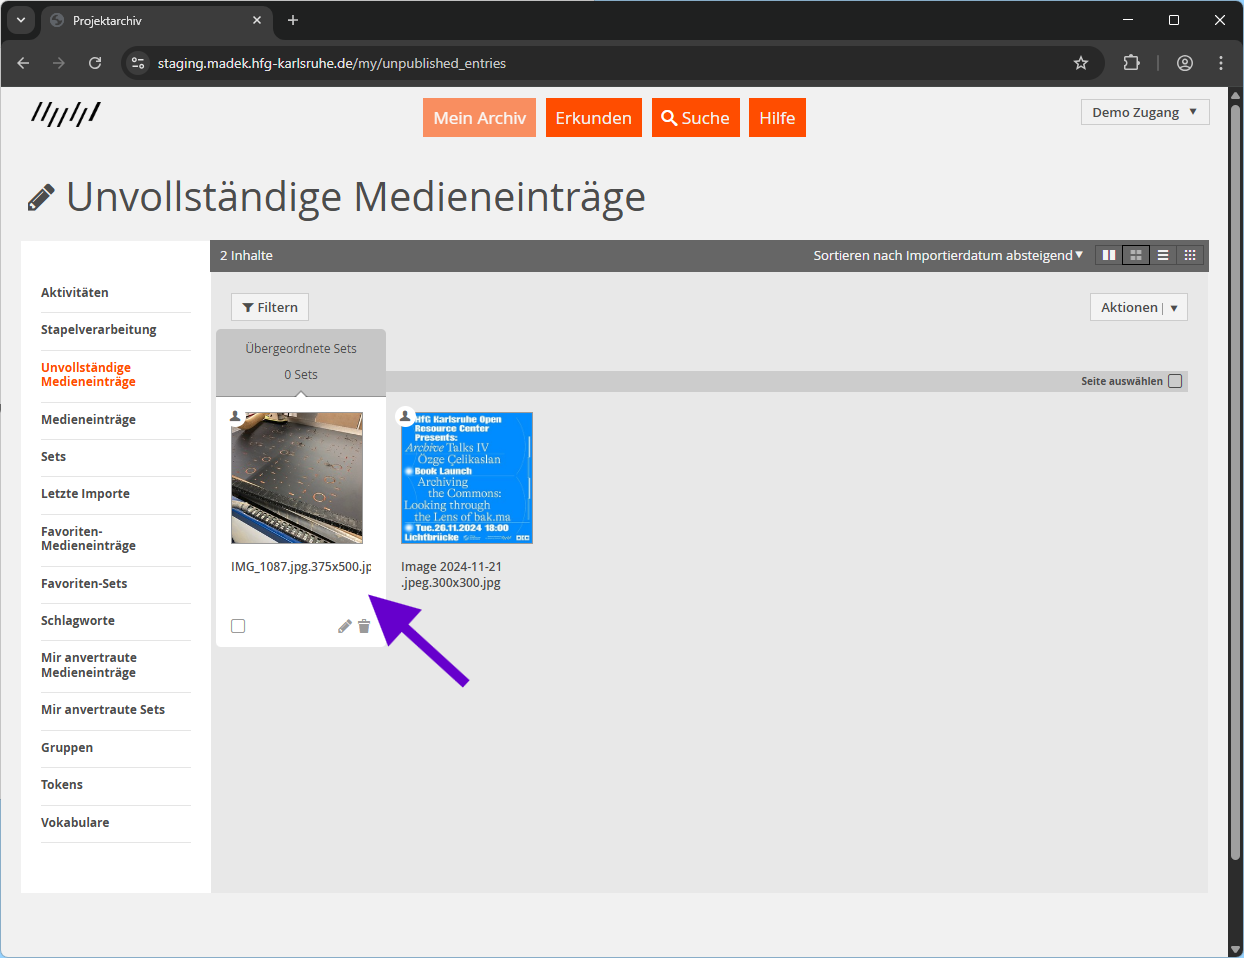
You can select individual entries or select several entries at the same time and process them in a batch. Batch processing is particularly recommended if you have many media entries with the same metadata.
Mandatory metadata
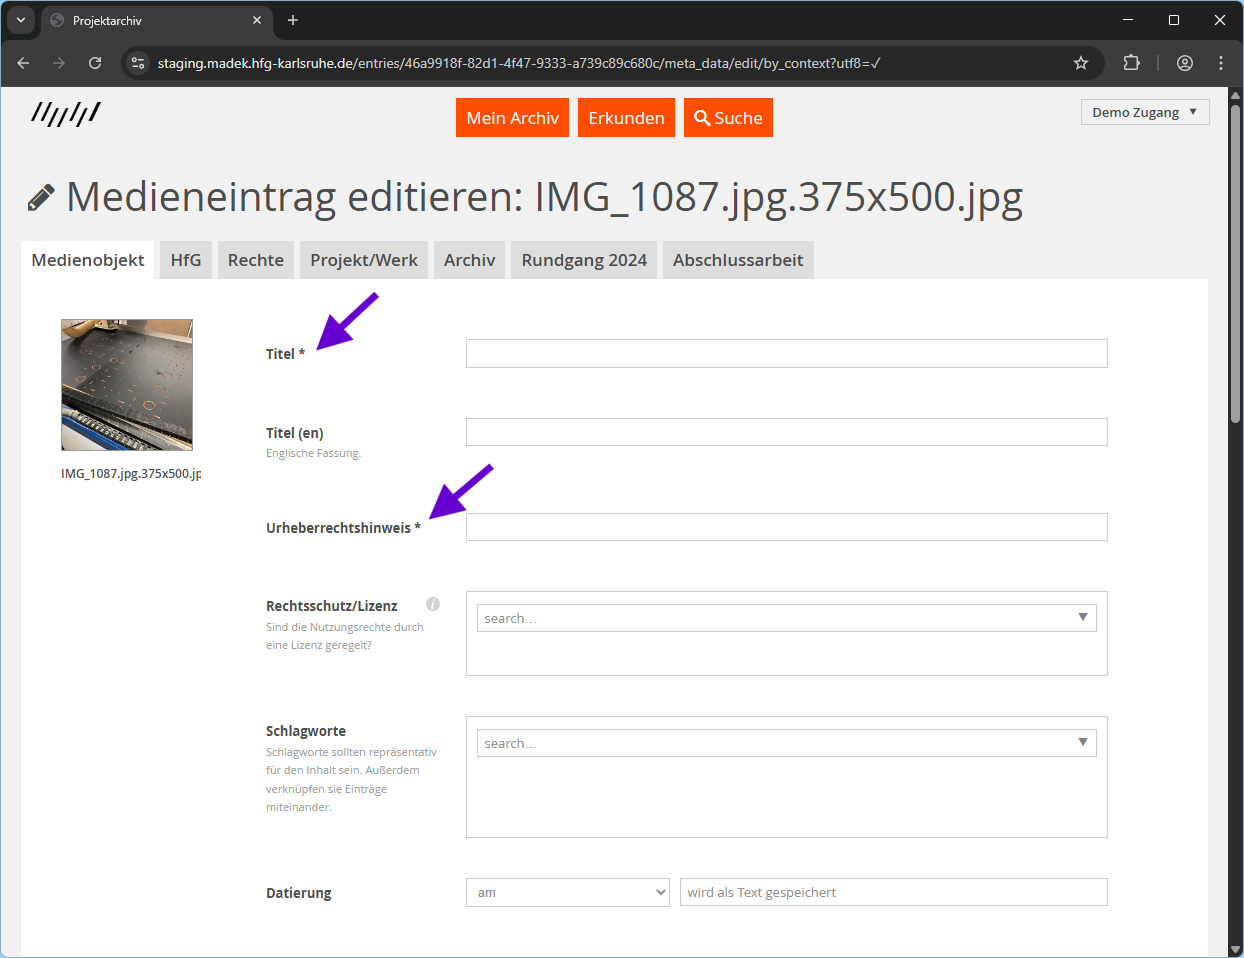
To complete a media entry, at least a title must be entered and the copyright notice given (the fields are marked with an asterisk).
The more comprehensive and precise you fill in the metadata, the easier it will be to research and understand the entry at the end.
Copyright notice
Fill in the author of the media entry. The author may be different from the author of the project. Several persons (co-authors) or institutions, corporations, companies, etc. can also be specified.
Legal protection/licenses
Licenses regulate the conditions under which the media you have uploaded (image, film, PDF, etc.) may be published and, if necessary, further used. Please choose a suitable license! You can find more information under the information icon.
NOTE: The information on copyright and license should not be confused with the “Permissions” that you assign in the project archive under the tab of the same name. You use the permissions to set who can see and possibly even edit (aka “share”) your created sets or media entries on the project archive page. The license, on the other hand, refers to the copyright, i.e. the publication and the conditions for further use in other contexts. For example, can anyone download this file and use it without attribution, e.g. in a flyer or on a website? With a license, you can specify, for example, that the file may be used but not modified, and that your name must always be mentioned (if you are the author).
Keywords
As you are creating the documentation of one single, completed project, the keywords of the media entries should be the same as those of the project set.
Relationship/Function
What role does this media entry play in your project? Please be precise with this information: “exhibition view”, for example, is more meaningful than “photography” or “documentation”.
Media description
Here you can provide more detailed information about the uploaded file.
Persons depicted
Please note the “right to one's own image” and Art Copyright Act § 22 and § 23. In many cases, photos and videos of people may only be distributed or publicly displayed with the consent of the person depicted.
Alternative text
Alt texts are an important condition for an accessible Internet. Users with visual impairments use screen readers to have the content of visual media read aloud to them. Please write a short linguistic translation of the uploaded file: What is it about, what can be seen?
6. Add media entries to the project set
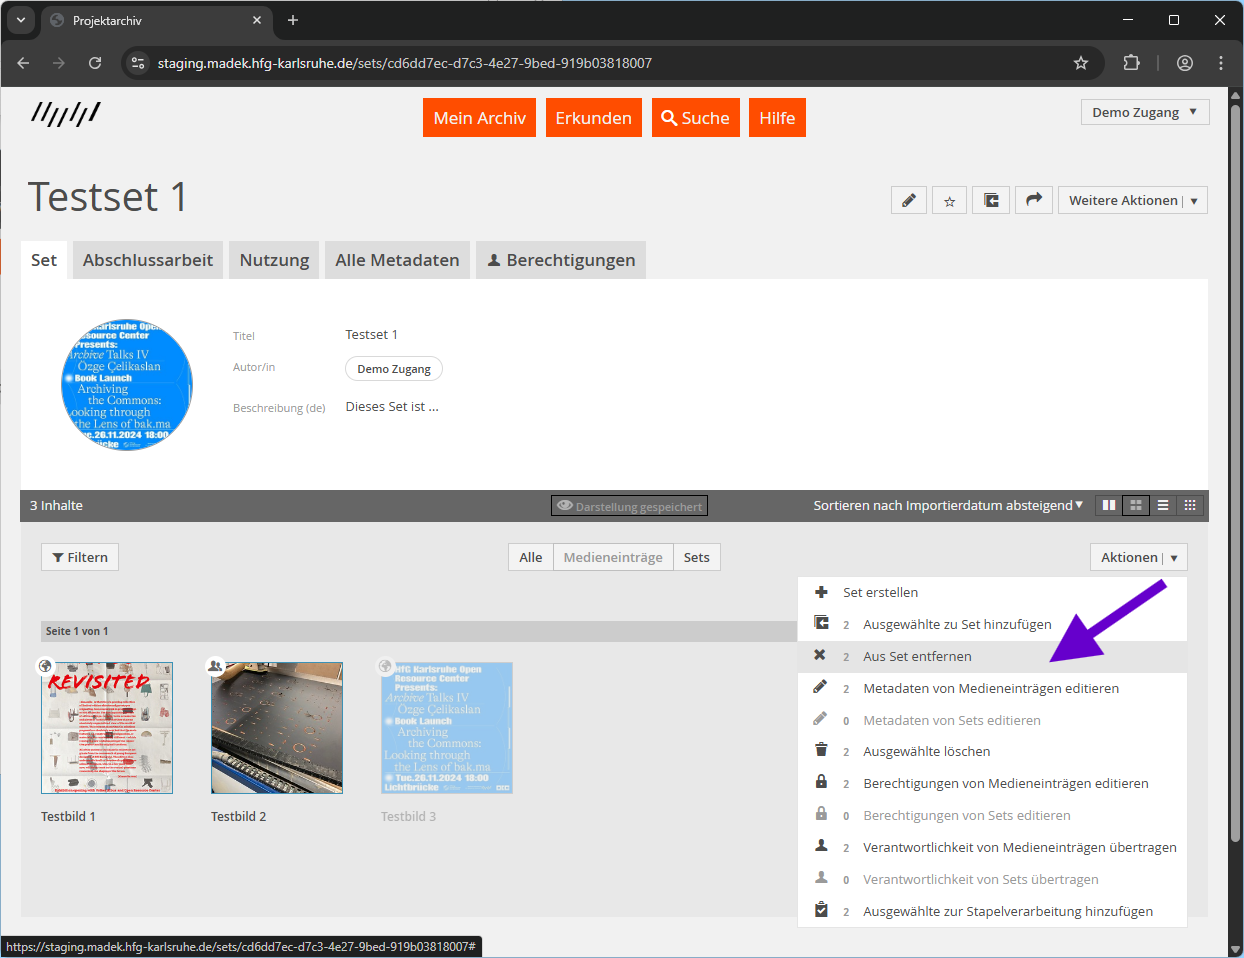
Go back to “My archive” and click on “Media entries” in the menu column on the left. Select all (complete) media entries that belong to your project. If you move the mouse over the individual entries, a box will appear at the bottom left. You can use this to select your media entries.
Once you have selected all entries, click on “Actions” at the top right and select “Add selected to set”. Enter the name of your project set in the search field and click “Save”.
You can upload new media, add it to the set or remove it from the set at any time and edit or delete your existing entries.
Note: If you have added the media entries to your project set and open your project set, you can use the “More actions” button to define the cover image of the project set as well as highlight particularly important entries.
7. Share media entries
To make your media entries visible to others, click on “Sets” in the menu column on the left, then click on your project set. Check whether all media entries are included.
Select individual media entries by moving the mouse over the entries until a box appears at the bottom left that you can click on.
You can also select all media entries in a row by clicking on “Select page” on the right.
Click on “Actions” and select “Edit permissions of media entries”.
On the following page, you can edit the permissions for the selected media entries. Decide for each group or user whether they are allowed to view your project set or even edit the metadata & content.
Tip: If you manage your media entries together with other users, you can also allow them to change the access permissions and thus make the project set visible to other users or groups .
Groups
The group “Hochschule für Gestaltung” means that every user of the HfG can see your project set after logging in.
Internet
If you share your project set publicly, visitors to the project archive who are not logged in will also be able to see it.
Don't forget to click on “Save” at the end.
8. Manage complex projects
If your project and its documentation are very complex and contain many different parts, then it can be helpful to structure the media entries into subsets. Such a case would be, for example, if your project consists of various physical objects that were shown in an exhibition, which in turn was accompanied by performances and a publication. In such a case, you could create four subsets for the documentation of the objects, the exhibition, the performances and the publication.
Create subsets
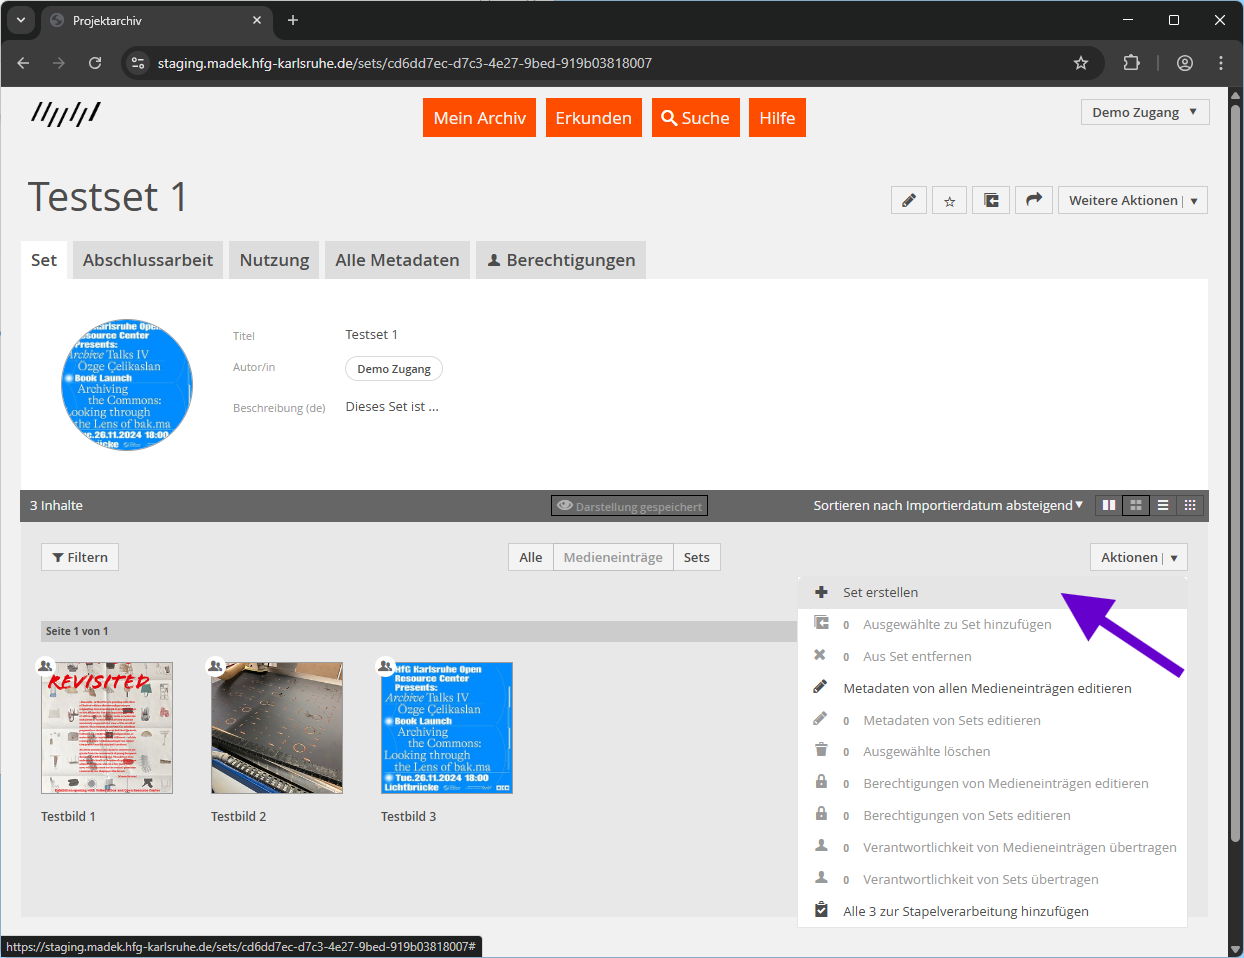
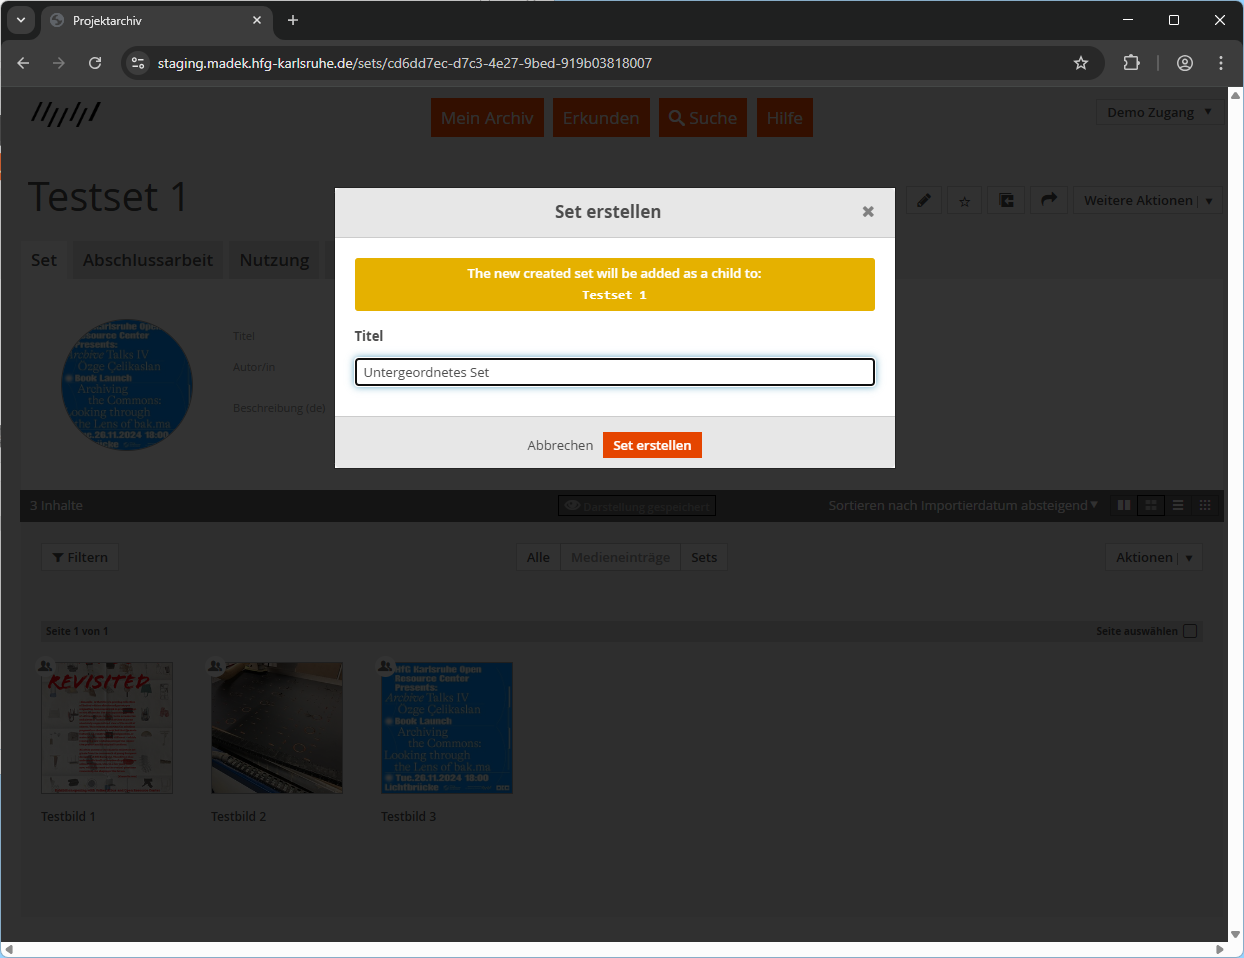
To do this, open the project set and scroll down to the “Actions” button. There you can create further subsets directly.
You can add media entries to the subsets as usual by selecting them and clicking on “Actions”.
Metadata of the subsets
In this case, it is sufficient to fill in a title and possibly a description. In this case, the subsets are only used for a better overview and administration. The relevant project information should be found in the project set.
However, you can of course also fill in all metadata fields here. This can be very helpful.
Contexts
You can use the Contexts tab to see what the links of a set or media entry look like.


